Furniture Scratch Repair: DIY Tips for Wood & Leather
A scratch on a dining table or sofa arm can change the whole room in a second. One drag of a ceramic mug, one toy car pushed too hard, one pet jumping up at the wrong angle, and a piece that looked settled and cared for suddenly becomes the first thing the eye notices.
Most scratches aren't the end of the story. Some need only a careful touch-up. Others need restraint more than effort, because the wrong repair can stand out worse than the original mark. That difference matters whether the piece is a newer factory-finished table, a painted accent cabinet, or a reclaimed wood statement piece with real character.
In Southern Oregon, homeowners and renters often want the same thing. A repair that looks natural, holds up to daily life, and doesn't turn into a weekend mistake. That practical approach has shaped furniture care advice since 1946, when George Gates built his business around a simple promise of Service and Value. That promise still fits scratch repair well. Helpful guidance first, unnecessary replacement last. For readers who want extra prevention ideas, this guide to protecting wood furniture from scratches and stains is a useful companion.
Table of Contents
- That First Scratch A Homeowners Guide
- First Assess The Damage And Material
- DIY Repair For Wood And Veneer Furniture
- Fixing Scratches On Laminate And Painted Pieces
- Caring For Scratched Leather Upholstery
- When To Call For Professional Furniture Repair
That First Scratch A Homeowners Guide
That first scratch usually comes with the same reaction. A quick stare, a hand over the damage, and then the question nobody likes asking. Can this be fixed?
In most homes, the answer is yes, at least to some degree. A scratch on a coffee table from a sliding remote, a line across a bedroom dresser from a metal zipper, or a mark on a dining top after a rushed cleanup doesn't always mean refinishing the whole piece. Furniture scratch repair works best when the repair matches the depth of the damage and the type of finish already on the furniture.
Older family pieces and one-of-a-kind reclaimed wood furniture deserve a slightly slower approach. A scratch on a character-rich surface isn't handled the same way as a scratch on a smooth factory-sealed top. That distinction matters because over-repair is common. People see a mark, reach for sandpaper too soon, and end up enlarging the problem.
A visible scratch is frustrating. A mismatched repair is harder to ignore.
That practical mindset has helped homeowners across Grants Pass, Medford, Ashland, and the Rogue Valley keep pieces in use rather than giving up on them. It also reflects the same local service standard that started in 1946, when George Gates built his reputation on Service and Value.
A calm repair starts with diagnosis, not products. Before touching the finish, it helps to answer two questions:
- How deep is it: Is the mark only in the clear finish, or has it cut into the material?
- What is the piece made of: Solid wood, veneer, laminate, painted furniture, or leather?
Those two answers determine almost everything that follows.
First Assess The Damage And Material
A good repair starts before any marker, filler, or conditioner comes out. The first job is to figure out whether the scratch is shallow, deep, or only a disturbance in the finish. The second is to identify the material, because the same method that helps wood can ruin laminate or leave a painted piece with a shiny patch.
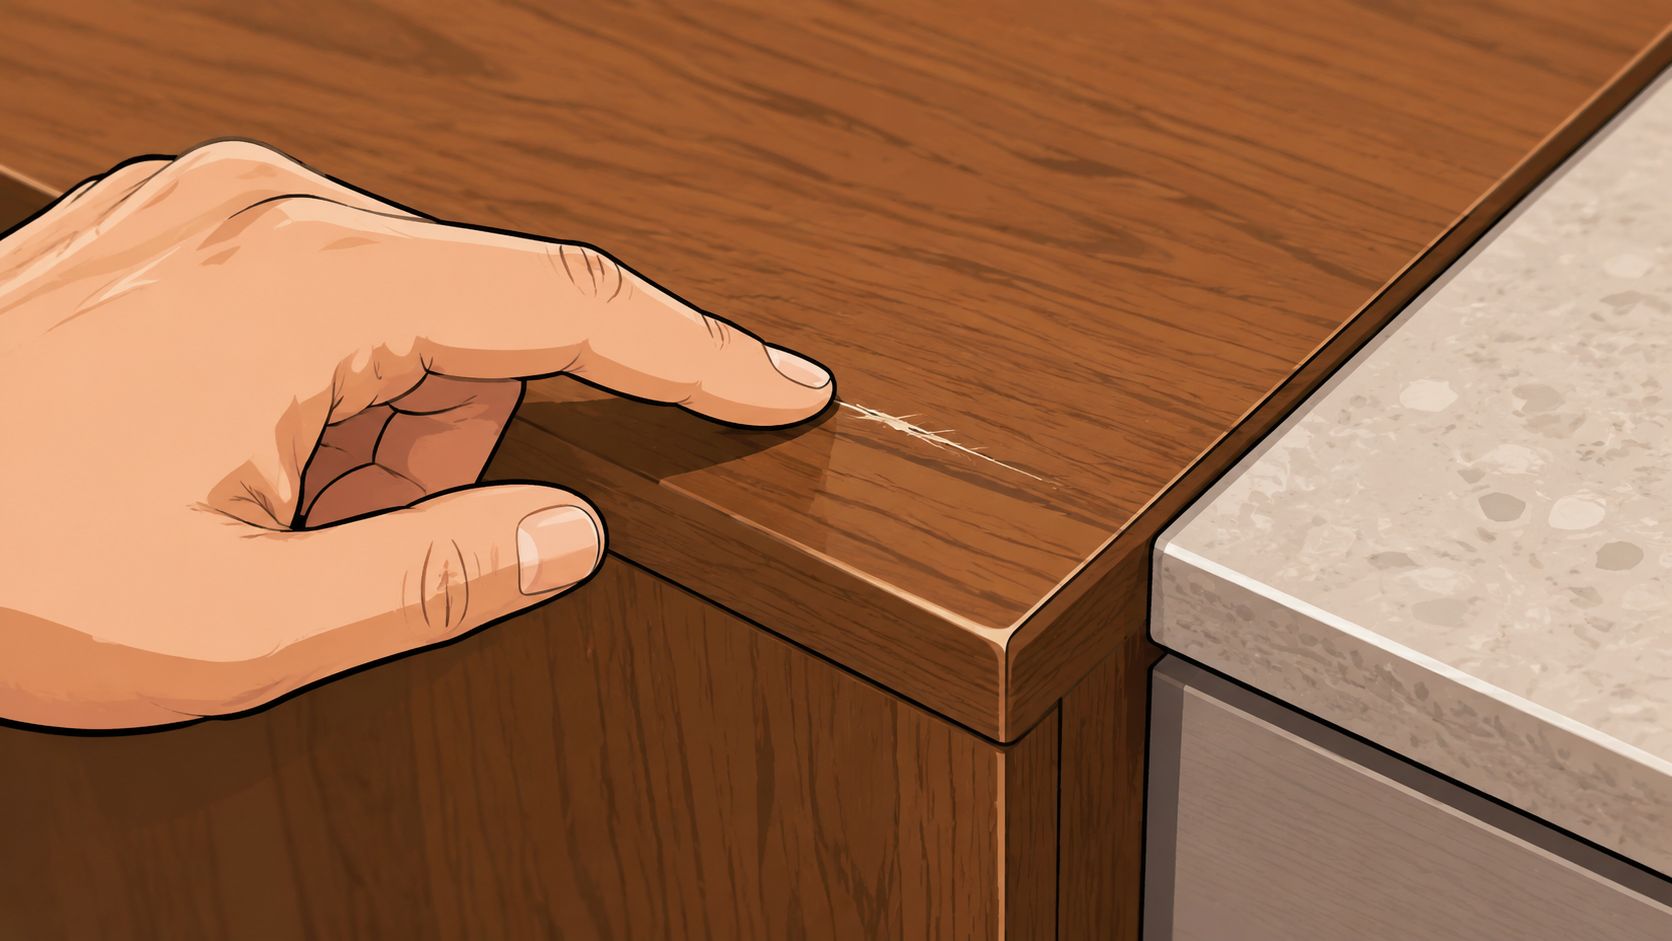
Start with the fingernail test
Run a fingernail lightly across the scratch.
If the nail doesn't catch, the damage is usually minor and limited to the finish. For those lighter finish scratches, the repair is mostly about blending color back into the surface. Expert demonstrations show a simple approach of flattening raised edges with 0000 steel wool, cleaning with mineral spirits, and then using a light-to-dark touch-up pen strategy before buffing, as shown in this minor finish scratch repair demonstration.
If the nail does catch, the scratch is deeper. That usually means color alone won't be enough. The damaged area may need filler, careful leveling, and a finish step to blend the repair.
Practical rule: If the scratch has depth, don't start with the darkest pigment in the room. Depth needs filling first, color second.
Match the repair to the surface
Material matters just as much as scratch depth. That's where many DIY repairs go sideways.
Use this quick reference before choosing a method:
| Surface | What usually works | What often causes trouble |
|---|---|---|
| Solid wood | Touch-up color for light marks, filler for deeper damage | Aggressive sanding across surrounding finish |
| Veneer | Gentle touch-up and minimal filler work | Deep sanding that cuts through the thin top layer |
| Laminate | Surface camouflage with repair paste or wax | Sanding, which can damage the printed layer |
| Painted furniture | Thin touch-up layers with matched sheen | Heavy dabs of paint that flash darker or glossier |
| Leather | Cleaning, conditioning, then color work if needed | Household cleaners and thick coatings |
For readers unsure whether a table or dresser is solid wood or veneer, this explanation of how to tell if furniture is real wood helps avoid the most common repair mistakes.
A careful assessment also saves time. If the piece has a matte or factory-sealed surface, the challenge isn't just hiding the line. It's avoiding a repair that leaves a gloss change, color halo, or texture mismatch.
DIY Repair For Wood And Veneer Furniture
Wood is where many scratch repairs succeed, but it's also where impatience shows up fast. A light mark on a finished tabletop can often be blended. A deeper gouge in wood veneer or solid wood needs a slower hand, especially if the surrounding finish still looks good.
Minor marks on finished wood
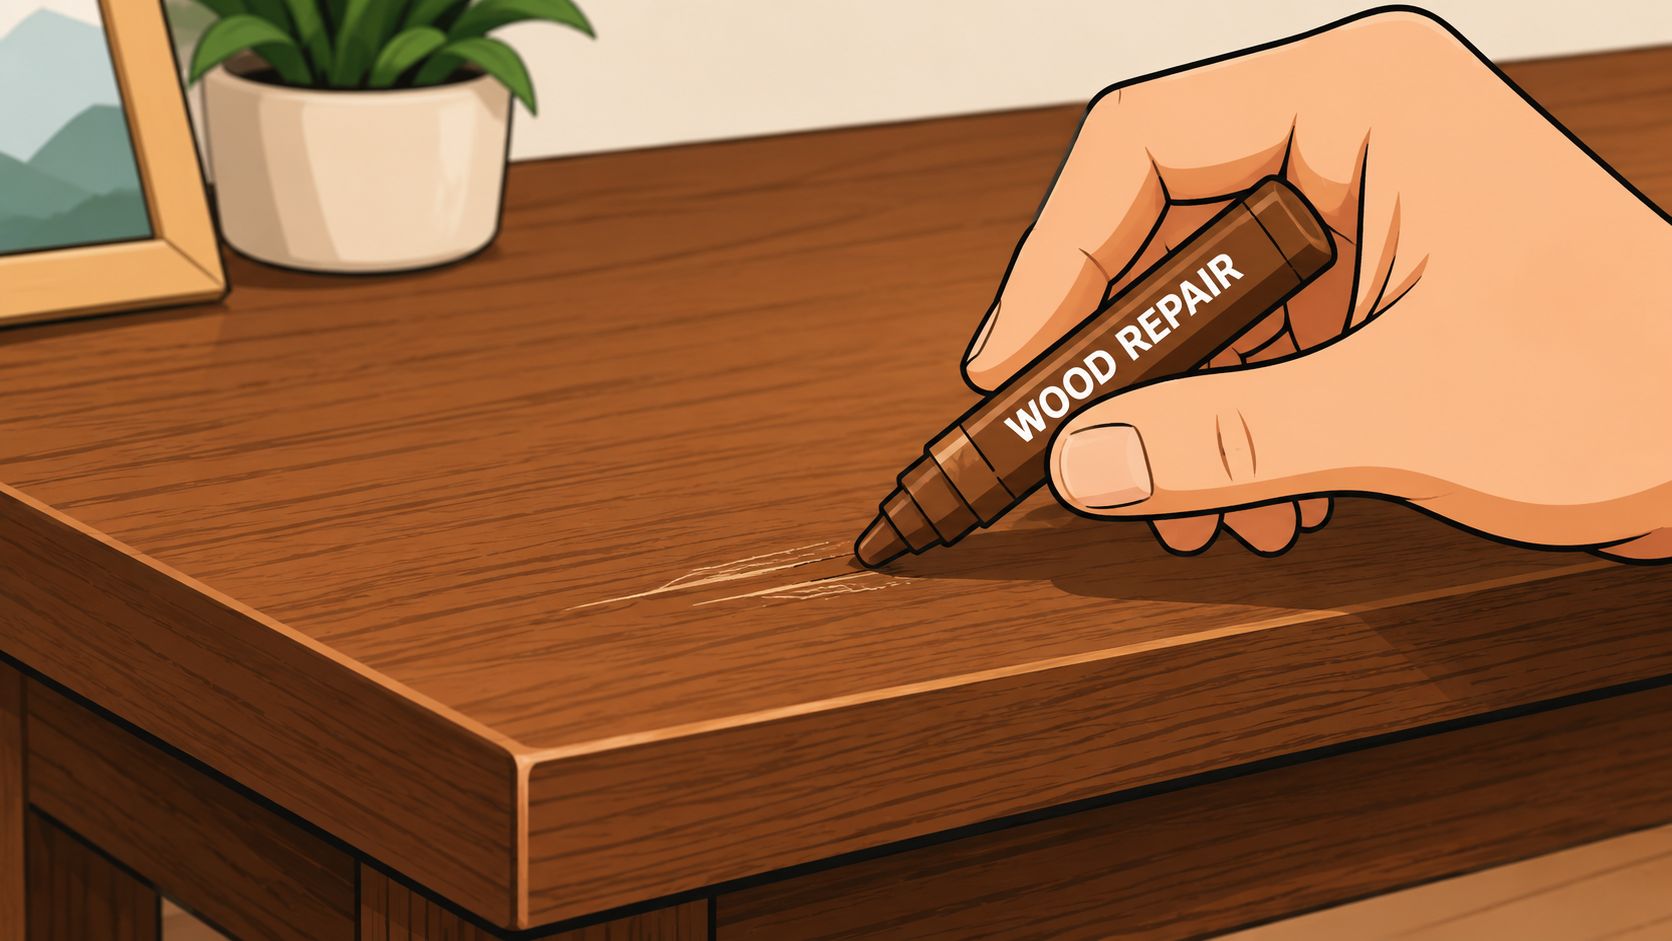
For small surface scratches on wood, the repair should stay as light as possible. The goal is to reduce contrast, not rebuild the whole top.
A simple sequence works well:
- Clean first. Remove dust, polish residue, and oils so the touch-up color doesn't sit on grime.
- Flatten only if needed. If the finish has a tiny raised edge, very gentle leveling helps the repair blend.
- Apply color gradually. Work from lighter tones toward darker ones. It's easier to add depth than remove a dark streak.
- Buff the area. A soft cloth helps blend the repair into the surrounding sheen.
Natural wood variation is important here. Grain has light and dark movement, so a single flat brown mark often looks fake. Thin, layered color usually disappears better than one heavy pass.
Shortcuts can help with very faint scuffs, but they aren't universal fixes. On some finishes, quick home remedies do very little. On others, they can leave residue that complicates later repair work. For everyday care after the fix, this article on how to care for wood furniture is a better long-term guide than relying on one-off tricks.
Deeper scratches that need filler
Once the scratch has real depth, color alone won't hide it. Light catches the valley. That means the surface has to be rebuilt before the eye can stop noticing it.
The standard professional workflow is straightforward and has stayed consistent for years. The repair involves cleaning with mineral spirits, filling with a color-matched wood filler, sanding smooth with fine-grit paper starting around 220 grit and finishing around 400 grit, then sealing with a stain marker or clear finish, as described in this deep wood scratch repair guide.
A steady process matters more than speed:
- Clean the groove so filler bonds to the damaged area instead of loose dust.
- Use color-matched filler rather than overloading the scratch with stain.
- Keep sanding tight to the repair so the surrounding finish isn't thinned unnecessarily.
- Seal the repair so the sheen is closer to the original surface.
Sanding should solve one problem only. If it starts changing the untouched finish around the scratch, it's gone too far.
Veneer needs extra caution because its wood layer is thin. On reclaimed wood and heavily grained pieces, a perfect invisible repair may not be realistic, but a careful repair can still make the damage far less noticeable while preserving the character that made the piece worth keeping.
Fixing Scratches On Laminate And Painted Pieces
Laminate and painted furniture create a different kind of repair problem. The damage may look simple, but these surfaces don't give much room for correction. A method that works on wood can permanently worsen a laminate top or leave painted furniture with a repair spot that reflects light differently than the rest of the piece.
Why modern finishes go wrong fast
One of the biggest gaps in scratch repair advice is finish-specific guidance. Generic methods often focus on traditional wood, but factory-sealed and matte finishes need a more careful approach to avoid a glossy spot, color halo, or texture mismatch, as discussed in this overview of finish-aware furniture scratch repair.
Laminate is especially unforgiving because its decorative surface is thin and uniform. Once that printed or sealed layer is damaged, sanding doesn't reveal fresh matching material underneath. It just removes more of the surface.
Painted furniture has a different challenge. The color might be close, but the sheen gives the repair away. A patch can match the paint chip in the can and still stand out because the original finish is flatter, glossier, or smoother.
The eye doesn't only see color. It sees light reflection, edge texture, and build thickness.
For homeowners refreshing painted pieces, some broader cabinet painting tips can help with color and finish decisions before a touch-up goes on the furniture.
A safer approach for each surface
For laminate, think camouflage instead of reconstruction. Use a repair paste or wax filler stick that matches the surface tone as closely as possible. Press it into the mark, remove excess carefully, and stop once the line is visually softened. Trying to chase perfection usually enlarges the repair area.
For painted furniture, treat the scratch like detail work:
- Use a fine artist's brush rather than a broad household brush.
- Build thin coats so the repair doesn't sit proud of the surrounding surface.
- Let each layer dry fully before judging the color.
- Check the sheen in side light because that's where mismatches show up first.
A slightly lighter touch-up often blends better than one that's too dark. Dark spots read as dirt or heavy overpaint, especially on light-painted cabinets, consoles, and bedroom pieces. If the piece sits near a bright window or under overhead lighting, the finish mismatch will show even more clearly. For rooms where furniture color and wall color work together, this guide to picking the right paint color for your home can help avoid touch-ups that feel out of place once the repair is done.
Caring For Scratched Leather Upholstery
Leather scratches are different from hard-surface scratches because the material moves, absorbs conditioners, and reflects light softly. A mark on a leather sofa arm or recliner can look severe at first, then calm down considerably once the surface is cleaned and the color is rebalanced.
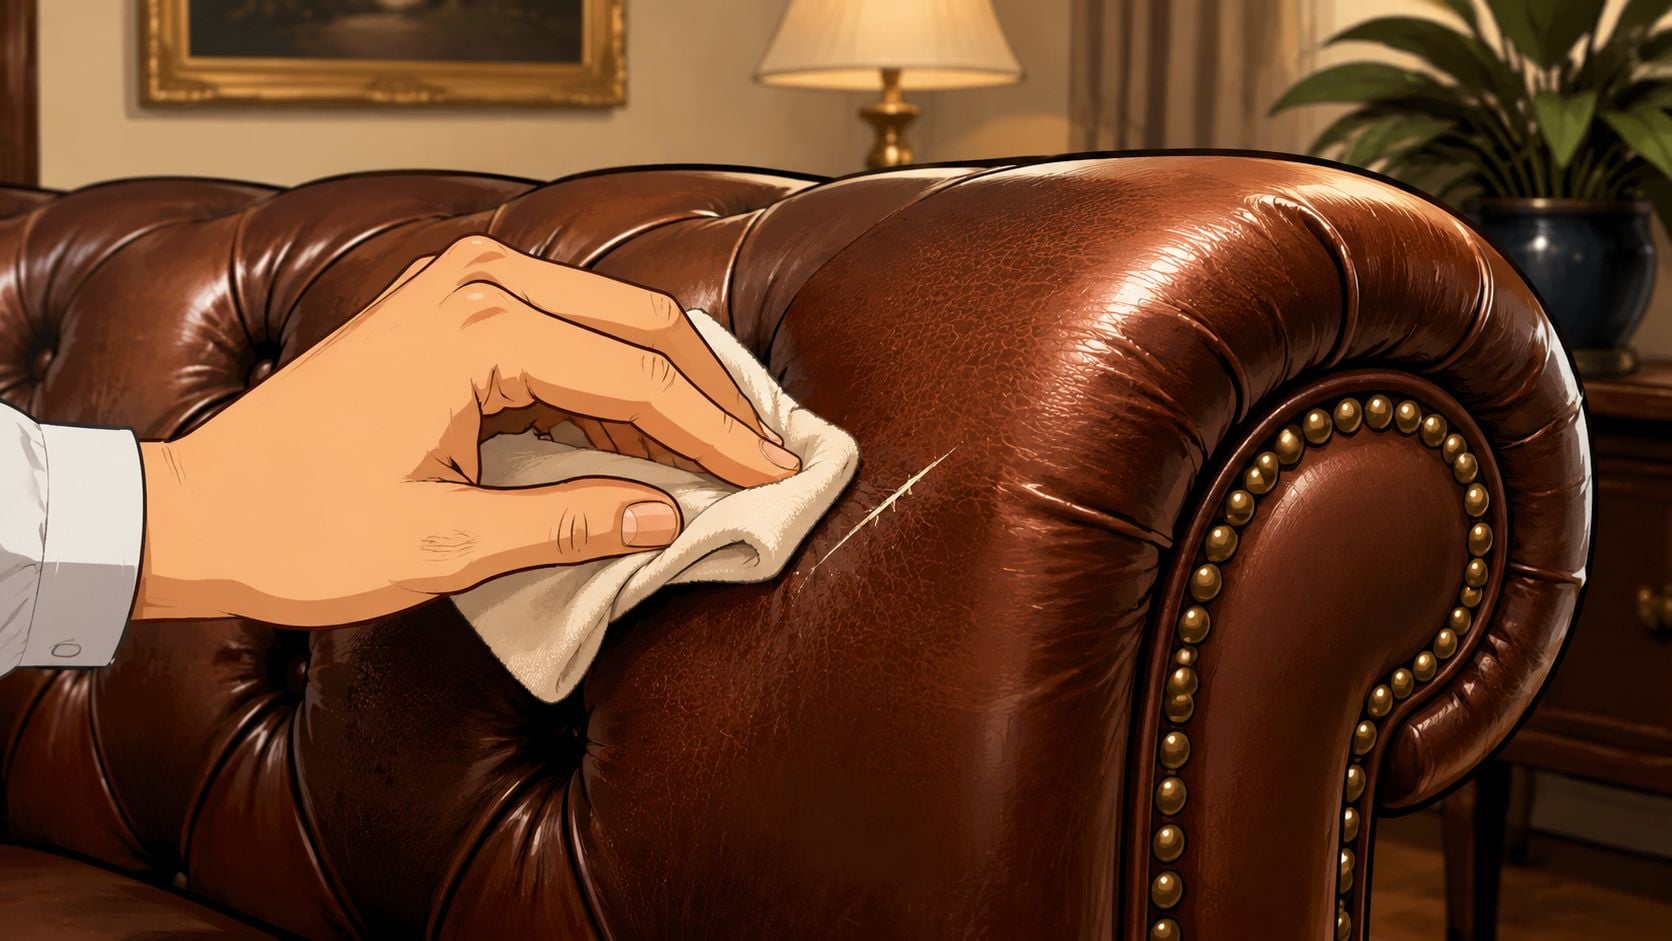
Light scratches and surface rubs
Start gently. Leather doesn't respond well to harsh rubbing or household cleaners meant for kitchens and hard flooring.
For a light scratch:
- Clean the area with a soft cloth so dirt isn't pushed further into the mark.
- Apply a leather conditioner to help the surface relax and reduce the dry, pale look around the scratch.
- Buff with microfiber using light pressure, not scrubbing.
This works best when the scratch is more of a surface rub than a cut. On many well-used recliners and sofas, the damage is partly displaced finish and partly dryness, so conditioning can make the line much less visible.
For ongoing maintenance, this leather sofa and furniture care guide helps prevent the dryness and abrasion that make scratches stand out.
When leather needs color work
If the mark has removed color, a leather color balm or repair kit is usually the next step. The key is restraint. Leather color repair looks better in several thin applications than in one heavy coat.
A dependable method looks like this:
- Test in a hidden area first, especially on cushions or inside edges.
- Mix or choose the closest color before applying to the visible scratch.
- Layer sparingly and let each pass settle before adding more.
- Stop when the scratch blends, not when the whole panel looks newly painted.
Some homeowners also like to compare process notes and tips for mending damaged leather before using a color product, especially on seating that sees daily wear.
In a large showroom setting, leather differences are easy to see side by side. Pull-up leather, protected leather, and pigmented finishes don't hide scratches the same way. That's one reason testing comfort and material in person matters. In a 30,000 sq. ft. showroom in Grants Pass, shoppers can compare leather seating from brands such as La-Z-Boy and Flexsteel and feel the finish before bringing it home.
When To Call For Professional Furniture Repair
Some scratches invite a careful DIY fix. Others punish it. If the piece is valuable, sentimental, structurally compromised, or finished in a way that's hard to match, professional repair is usually the smarter choice.

Repairs that are worth handing off
Professional help makes sense when the scratch is only part of a bigger problem.
That includes cases like these:
- Deep gouges with missing material that need rebuilding and finish matching
- Peeling veneer where lifting edges can spread during amateur sanding
- Antiques or heirlooms where a failed repair can lower both appearance and value
- Factory-finished matte surfaces that are difficult to blend without flashing
- Damage near edges and corners where touch-up is more visible from multiple angles
The economics often support repair. According to HomeAdvisor's furniture repair cost guide, the average professional furniture repair cost is $185, with a typical range of $106 to $273. The same source notes that quick cosmetic touch-ups can be as low as $50, while more complex work can reach $500. For wood surfaces, it also aligns with the range cited for scratch-related repair work. That puts professional furniture scratch repair in a practical middle ground for pieces worth preserving.
When repair makes more sense than replacement
A good repair preserves materials, finish character, and daily usability. That's especially true for solid wood dining tables, better-quality bedroom pieces, reclaimed wood furniture, and leather seating that still has years of life left in it.
In Southern Oregon homes, replacement isn't always the first or best answer. But when a piece isn't worth saving, replacement should be easy, not stressful. Gates Home Furnishings offers a service department for post-purchase support, and if replacement is the better route, shoppers can compare styles from Ashley, Flexsteel, La-Z-Boy, and Beautyrest, along with reclaimed wood and teak Unique Finds. Practical budget options matter too, including Gates Easy Pay with $0 down, 6-month interest-free, and no-credit-needed options. Delivery matters just as much. White-glove service means professional assembly instead of dropped boxes, plus mattress haul-away when needed.
That same service mindset has guided local furniture help since 1946, from Grants Pass to Medford, Central Point, Ashland, and across the Rogue Valley. George Gates built that reputation on Service and Value, and scratch repair fits squarely inside that promise. Honest advice, careful handling, and no pressure to replace what can still be restored.
If a scratched piece needs a second opinion, or if it's time to replace something that's past repair, Gates Home Furnishings is a local place to start. Visit the Grants Pass showroom to test comfort in person, explore one-of-a-kind reclaimed wood and teak pieces, and ask about white-glove delivery, assembly, and flexible financing. Shoppers across Grants Pass, Medford, Central Point, Ashland, and the wider Rogue Valley can also browse the collection online.