
How to Antique Wood Furniture with Paint


The most popular advice about antiquing furniture starts with sandpaper and paint. That skips the two decisions that protect the piece: should it be painted at all, and could its existing finish contain lead? A convincing antique effect depends less on making furniture look battered and more on respecting its construction, history, and likely wear pattern.
Antiqued painted wood has a long decorative tradition. European Neoclassical makers imitated archaeological colors, aged architectural surfaces, and oxidized bronze with layered pigments, translucent coatings, glazing, brass particles, and gold powder. Surviving furniture shows that the effect came from superimposed layers, not one flat coat. The same principle still works for a reclaimed cabinet, teak console, dining chair, or painted dresser, provided the finish suits the piece.
Before the First Brushstroke Comes Off the Shelf
An old finish isn't automatically a problem waiting for paint. It may be the most valuable part of the furniture. Original color variation, softened corners, and a naturally developed patina can tell more about a piece than a manufactured distressing pattern ever will.
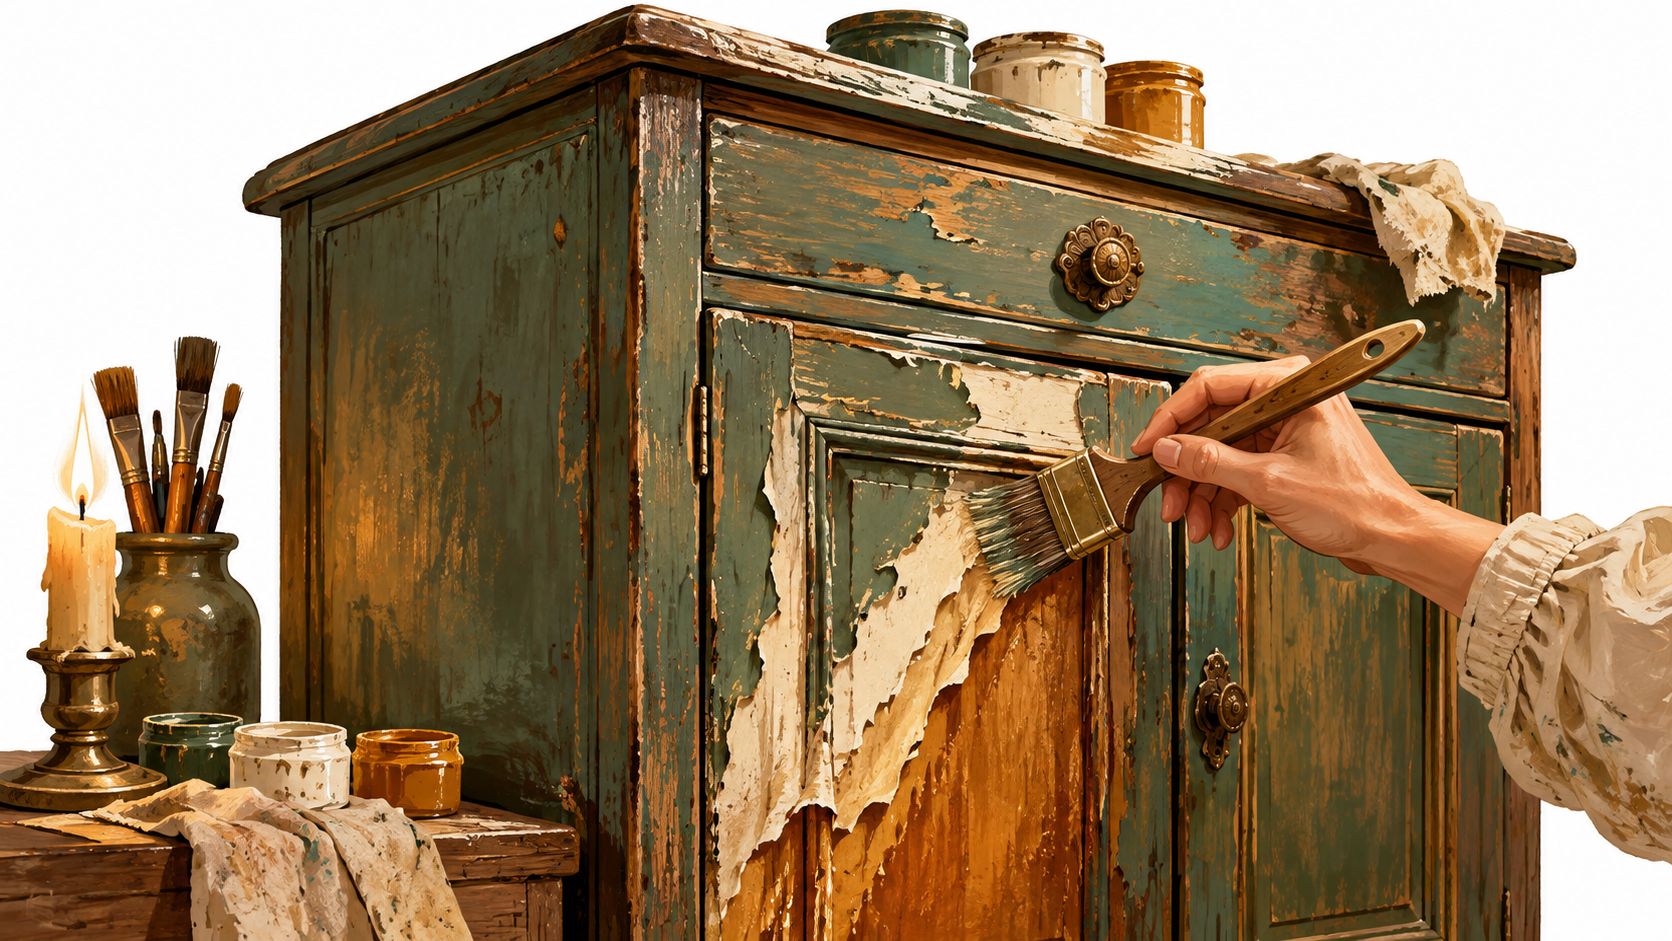
Decide what the furniture is asking for
Preservation deserves priority when a piece has several of these characteristics:
- Identifiable age: Maker marks, period details, or construction methods suggest that the surface is part of the furniture's story.
- Hand-cut joinery: Uneven but purposeful joints can indicate older craftsmanship that shouldn't be hidden beneath a decorative makeover.
- Intact patina: Gentle color changes and softened contact points may be original character rather than damage.
- Fragile veneer: Thin veneer can disappear quickly under aggressive sanding, leaving an irreversible repair problem.
Painting becomes more reasonable when the existing finish is modern, severely damaged, poorly bonded, or so stylistically unsuitable that the owner wants a new decorative purpose. A scratched factory coating on a sturdy, newer cabinet is a different proposition from a fragile painted surface on a historic dresser.
Practical rule: If the piece has a story that can be documented, pause before changing the surface.
Photograph the furniture from every side, record maker marks and construction details, and note loose joints, veneer lifting, stains, and previous repairs. If the piece is valuable or historically important, a conservator should assess it before any irreversible work. Conservation guidance warns that sanding can remove original wood and patina, while strong cleaning can harm painted surfaces. The museum guidance on caring for wooden furniture is useful reading before treatment begins.
For a reclaimed wood or teak piece with little historic finish, a restrained layered effect can highlight rather than disguise the material. Readers comparing solid wood and veneer can also review this practical guide to telling whether furniture is real wood. A cabinet painter's advice on cabinet painting for Applewood homes can offer another perspective on evaluating an existing coating before repainting.
The decision tree is simple: preserve identifiable, intact, or fragile character; repaint a stable piece whose current finish is modern, damaged, or unwanted; and ask a professional to inspect anything historically significant or structurally delicate. Once the decision is made, the next question is whether preparation can be done safely.
Lead Safety and Surface Prep Done Right
Preparation controls both adhesion and safety. An old table may look harmless, but earlier paint layers can contain lead. The U.S. Consumer Product Safety Commission banned the sale of lead-based residential paint and prohibited its use on household furniture and children's toys in 1978. EPA data indicate that approximately 87% of homes built before 1940 contain some lead-based paint, compared with 24% of homes built from 1960 through 1978. A separate HUD estimate found 34.6 million U.S. homes, or 29.4% of all housing units, still contain lead-based paint applied before the ban, as documented in this EPA lead-paint reference.
Test before disturbing old coatings
If the furniture came from a pre-1978 home, or its coating is unknown, test suspect layers or presume lead until qualified testing says otherwise. Don't dry-sand, aggressively scrape, or create clouds of chips indoors. Isolate the work area from children, pets, upholstery, and heating or cooling pathways.
EPA DIY guidance recommends minimizing dust, using containment, controlling waste, and completing HEPA and damp cleanup. If sanding can't be avoided, wet-sanding or a sander attached to a HEPA-filtered vacuum is safer than dry abrasion. Flaking, powdering, or unstable old paint is a good reason to stop and seek qualified assistance rather than force the project forward.
Follow the preparation sequence
After safety has been addressed, the physical preparation should proceed in order:
- Remove hardware. Take off pulls, hinges, and removable fittings so paint doesn't build around them.
- Clean thoroughly. Remove wax, grease, polish, and dirt with an appropriate cleaner. The guide to cleaning antique wood furniture explains why residue must be removed before coating.
- Repair defects. Tighten loose joints, fill suitable dents, and stabilize lifting veneer. Paint won't correct movement underneath.
- Scuff the finish. On a sound coating, use approximately 180- to 220-grit abrasive in the direction of the grain. For a stubborn glossy coating, 80- to 100-grit sandpaper may provide the necessary tooth, but unknown old paint should not be aggressively sanded.
- Remove every trace of dust. Vacuum carefully, then use a damp rag or tack cloth. Dust left behind becomes texture under the primer.
- Prime thinly. Apply an even bonding or stain-blocking primer. Allow it to cure fully, then lightly smooth the primer before color coats.
Use two thin paint coats instead of one heavy coat, and follow the manufacturer's full recoat interval. Water-based coatings generally need conditions around 50°F or warmer, ventilation, and moderate humidity. Damp or cool rooms extend drying time. Wood should not be visibly damp, and a general coating benchmark is moisture below 20%.
A properly primed surface feels even, shows no loose edges, and has no visible sanding scratches or dust bumps. Knots, resin, and tannin-rich oak or teak may need spot-sealing before the full primer coat, or brown and yellow bleed-through can appear later.
Choosing the Right Paint for Your Piece
The paint type changes how easily the finish distresses, how much preparation it needs, and how well it withstands daily contact. There isn't one universal winner. A dining table needs a different balance of adhesion, toughness, and repairability than a decorative nightstand.
Matching Paint Type to Project
| Paint type | Best for | Prep needed | Signature result |
|---|---|---|---|
| Chalk paint | Beginner projects, nightstands, decorative cabinets | Clean thoroughly, then follow the product's bonding guidance | Soft, easily distressed finish |
| Latex or acrylic enamel | Dining tables, frequently touched furniture, consistent color | Clean, scuff, and prime as required | Durable, even surface with controlled color |
| Milk paint | Reclaimed wood, country furniture, naturally varied surfaces | Careful mixing and stronger attention to the existing seal | Slightly uneven, authentic aged character |
Chalk paint is often the friendliest starting point because it can adhere well with limited preparation and sands easily at the edges. That convenience comes with a responsibility: a wax or compatible sealer is needed for daily-use furniture. Chalk paint can also look too soft on a surface that receives constant contact unless the protective finish is selected carefully.
Latex or acrylic enamel provides better durability and color consistency for a tabletop or heavily handled cabinet. It can emphasize brush marks, especially when applied too thickly, and it generally won't produce a convincing crackle effect without a dedicated crackle medium.
Milk paint suits reclaimed and country pieces because its slight variation feels less manufactured. It requires mixing and is less forgiving over a slick, previously sealed surface. A test patch matters more with this choice because absorption and bonding can change across one old board.
For a dining table, acrylic enamel is usually the sensible direction. A nightstand can handle chalk or milk paint, while a vintage dresser may benefit from milk paint when an uneven aged appearance is the goal. A guide to choosing a paint color for the home can help coordinate the finished piece with surrounding walls and upholstery. For a broader look at refreshing built-in surfaces, readers can also review these cabinet updates for Jacksonville homes.
Layering Techniques That Build Real Depth
A convincing antique effect usually comes from choosing one main technique and supporting it with restrained color variation. Combining every effect on the same cabinet often creates visual noise. The strongest result gives the eye a reason to believe the finish developed over time.
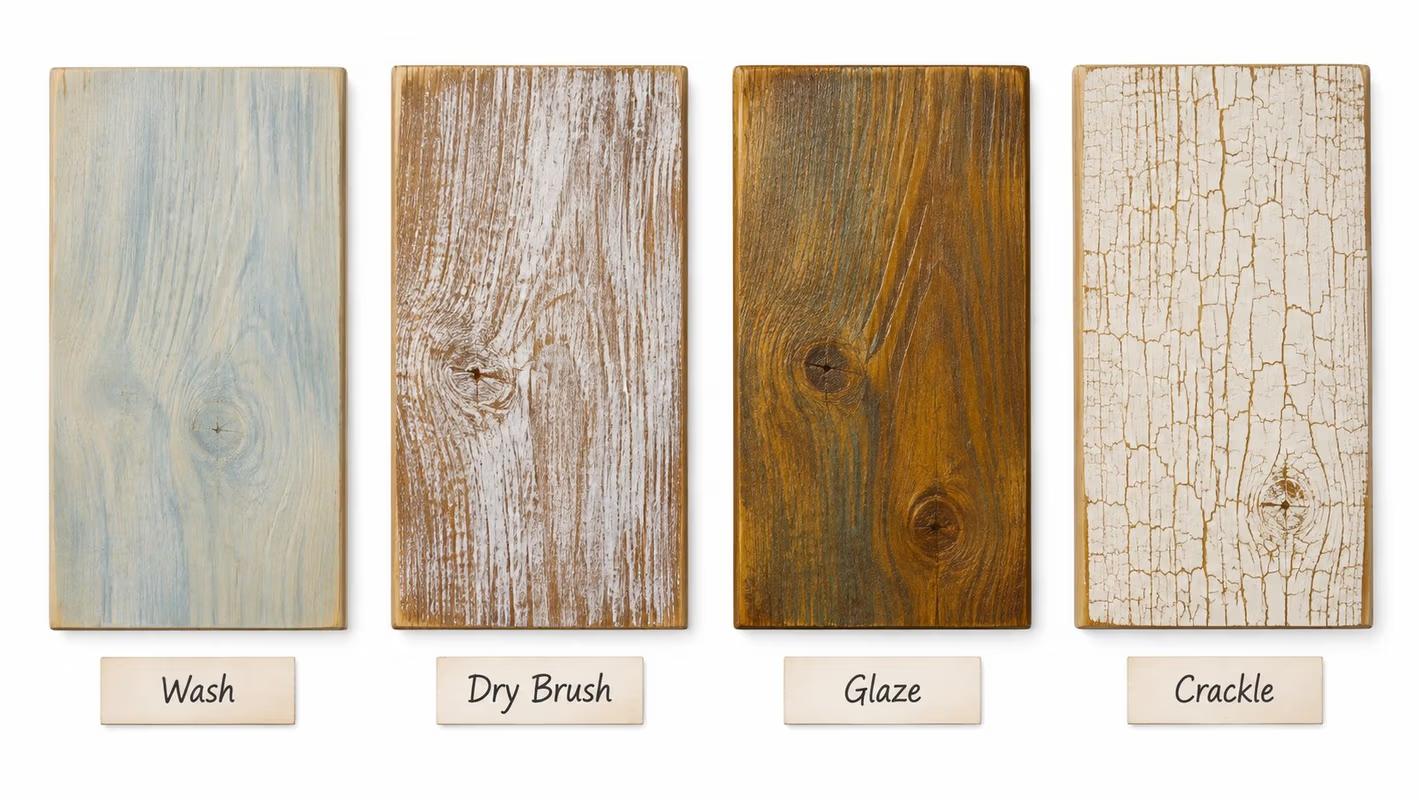
Choose the effect before opening the jar
Color wash creates a soft, sun-faded appearance. Thin a compatible paint, brush it over a small area, and wipe it back before it dries. This works well on farmhouse-style furniture where the wood grain should remain part of the image. Stop when the color variation looks quiet rather than cloudy.
Dry-brushing highlights raised details. Load a brush with very little paint, remove most of it on a clean surface, and lightly graze moldings, carved edges, and frame details. This is particularly effective on a carved dresser or mirror frame. Stop when the raised areas catch light without looking striped.
Crackle medium creates deliberate splitting between a base color and a contrasting topcoat. It requires careful timing, thin application, and a test panel because the effect depends on the medium, the thickness of the topcoat, humidity, and the point at which the upper layer is applied. Interior and exterior crackle products are formulated for different conditions, so the product directions matter. Stop before every surface becomes cracked. A few strategically placed areas look more believable than a uniform web across the whole piece.
Antiquing glaze adds depth to recesses and is often the most versatile method. Work in small sections, brush the dark glaze into grooves, corners, moldings, and carved details, then wipe raised and flat areas more cleanly. Published furniture methods recommend wiping back within roughly 5 to 10 minutes, because the glaze becomes harder to remove as it dries. Test the complete color and wipe-back process in an inconspicuous place first.
A distressed cabinet can demonstrate this layered approach, especially when its architectural details already create natural shadows. The distressed cabinet collection offers useful visual reference for how dark recesses and lighter raised areas work together.
Distressing Edges Where Wear Would Naturally Land
Distressing should follow the furniture's use, not the painter's impatience. Real wear appears where hands pull, bodies brush, objects slide, and corners meet the surrounding room. Broad, untouched panels usually make the worn edges look more convincing.
Read the contact points
Start with the areas most likely to have received repeated handling:
- Drawer pulls and openings: The edge around a pull can show gentle exposure, especially where fingers would land.
- Front corners: Corners catch passing clothing and cleaning cloths.
- Table and cabinet edges: The front lip and raised rim receive more contact than the center of a broad panel.
- Feet and lower rails: Moving furniture and sweeping floors can soften these locations.
- Raised moldings: Decorative profiles naturally lose a little color on their high points.
Use a fine sanding sponge or fine abrasive with a light touch. On a chalk-painted surface, a damp cloth can remove a small amount of paint without producing unnecessary dust. A craft knife may define a narrow detail line, but it should never be used to gouge structural wood. For tiny dents, a chain-link or a few screws wrapped in cloth can create irregular marks. Heavy impact tools and aggressive machinery usually make furniture look attacked rather than aged.
Wear should be irregular, but it should never be random.
Distress the topcoat lightly before applying the glaze, allowing the contrasting layer beneath to show at selected edges. Leave most flat panels alone. If every corner, center, and rail receives equal treatment, the eye stops reading the finish as earned.
Readers working on cabinetry can compare this approach with practical guidance for antiquing wooden cabinets for homeowners. The final test is distance. Step back, look at the piece as a whole, and stop when the eye notices the shape and material before it notices the technique.
Sealing the Finish So It Lasts
The sealer determines how the surface feels, reflects light, and handles everyday use. It also affects the color of a glaze and the ease of future repairs. A decorative mirror frame can accept a different finish from a dining table that receives spills, wiping, and constant contact.
Sealer Comparison for Antiqued Finishes
| Sealer | Durability | Sheen | Maintenance |
|---|---|---|---|
| Paste wax | Moderate for light-use furniture | Soft, warm, and naturally aged | Reapplication is needed as wear develops |
| Polycrylic | Strong water-resistant protection | Clear to varied sheen, depending on product | Test first because it can shift glaze color |
| Hardwax oil | Durable when correctly applied and cured | Matte, tactile, furniture-store feel | Careful application and longer cure time |
Paste wax is well suited to a chalk-painted nightstand or decorative cabinet. It gives the softest sheen and an authentic aged feel, but it isn't the first choice for a heavily used tabletop. Tabletops may need reapplication roughly every year or so, depending on use and the product instructions.
Polycrylic is the practical choice for a painted dining table or frequently handled furniture that needs water-resistant protection. It can slightly change the appearance of a glaze, so the full system should be tested on an inconspicuous area for color change, wrinkling, and adhesion before the entire piece is coated.
Hardwax oil suits reclaimed wood and teak consoles where a matte, touchable surface is part of the appeal. It penetrates the wood rather than leaving the same kind of film as a conventional clear coat, but it demands careful application and a longer cure period. The surface should not be returned to ordinary use before the product has fully cured.
The finish should be compatible with the paint and applied in thin, even layers. A quality benchmark includes a uniform sheen, no exposed raw edges except intentionally distressed areas, and smooth drawer operation after curing. More guidance on protecting finished wood appears in this wood furniture care guide.
Four failures that have clear causes
Peeling within weeks usually means the coating was applied over contamination or an unprimed, poorly bonded surface. The repair is to remove loose material back to a sound edge, clean, prime, and recoat. The preventive habit is complete cleaning and a bonding primer where the surface requires it.
Blotchy or streaky color often points to tannin, resin, or knots bleeding through light paint. Spot-seal those areas with a compatible stain-blocking primer before applying the full primer coat. Testing the complete system on a hidden area would have exposed the problem earlier.
Crackle that refuses to crack generally results from a topcoat that is too thick, incorrect timing, or unsuitable humidity. Thin the upper layer, observe the product's timing window, and test a small panel before touching the finished piece. Crackle is controlled by conditions, not force.
Sticky or tacky glaze indicates over-application or a work area that was too large to wipe back in time. Remove what can be lifted safely with an appropriate solvent, then rebuild with thin layers in small sections and wipe within the 5- to 10-minute window. Working methodically prevents the glaze from becoming a stubborn film.
Showing Off the Finished Piece
A carefully antiqued cabinet or table should anchor a room, not compete with every other surface. Pair strong distressing with quieter upholstery, natural textiles, or a single contrasting accent. If the piece already has dramatic grain, keep the paint layers restrained so the wood remains visible.
Photographs and measurements help when choosing nearby furnishings. Homeowners in Grants Pass can bring those details to the 30,000-square-foot showroom, while shoppers from Medford, Central Point, Ashland, and the broader Rogue Valley can plan a visit around other Southern Oregon errands and landmarks. Reclaimed wood and teak Unique Finds can help connect a newly finished piece with a larger dining, living, or bedroom arrangement.
For a wider room refresh, Gates Easy Pay offers flexible financing options, including $0 down, 6-month interest-free, and no-credit-needed options, subject to program terms. New furnishings can also arrive through white-glove delivery, with professional assembly, setup, and mattress haul-away rather than boxes left at the door.
Gates Home Furnishings has served Southern Oregon since 1946, built on George Gates' promise of “Service and Value.” That same patient approach helps when a finished piece needs the right sofa, recliner, bed, dining set, or accent cabinet around it. The showroom carries brands including La-Z-Boy, Flexsteel, Ashley, and Beautyrest, alongside distinctive one-of-a-kind furniture.
For paint inspiration, reclaimed wood, teak Unique Finds, and furnishings that complete an antiqued room, visit Gates Home Furnishings. The Grants Pass showroom team can help compare finishes and comfort in person, or shoppers can browse the collection online before planning the next project.
