How to Restore Teak Furniture to Its Natural Beauty

When folks in our Grants Pass showroom ask if their old teak furniture is worth saving, our answer is almost always a resounding yes. It’s one of the most rewarding DIY projects out there. Teak has amazing natural oils that make it incredibly resilient, whether it’s an indoor dining table or an outdoor bench that’s weathered to a silvery grey.
The secret isn’t just elbow grease—it’s about using the right approach, from cleaning and sanding all the way to choosing the perfect finish. We're here to share the same neighborly advice we've been offering for decades.
Bringing Your Teak Treasures Back to Life

Here at Gates Home Furnishings, we’ve seen countless teak pieces become cherished family heirlooms since we first opened our doors back in 1946. Our founder, George Gates, built this business on a simple promise of "Service and Value." That’s a philosophy we stick to today, and it’s why we love helping our neighbors throughout the Rogue Valley get the most out of their furniture.
Learning how to restore teak isn't just about saving a piece of furniture; it's about preserving memories and appreciating real quality craftsmanship that lasts.
Why Is Teak Worth Restoring?
Unlike a lot of other woods, teak is packed with natural oils. This gives it a built-in defense against water, rot, and even pests, which is exactly why you see it used for everything from outdoor patios in Medford to the stunning indoor statement pieces you'll find in our collection of Unique Finds.
Over time, you’ll notice outdoor teak develops a distinguished, silvery-grey patina. Don't panic! That’s actually a natural protective layer, not a sign of damage. A good restoration simply peels back that layer to reveal the warm, golden-brown hue it had on day one.
To us, restoring teak furniture perfectly aligns with our love for our "Unique Finds." There's nothing more satisfying than giving a high-quality, reclaimed wood furniture piece a new chapter in your home.
What This Guide Covers
We wrote this guide to give you the same practical, no-nonsense advice we’d offer if you stopped by our 30,000-square-foot showroom in Grants Pass. We’ll walk you through the whole process, from figuring out what your piece needs to applying that beautiful final finish.
Here’s what we’ll get into:
- Assessment: How to diagnose your furniture’s condition so you know where to start.
- Preparation: The must-do cleaning and sanding steps that make all the difference.
- Finishing: The big debate—oiling vs. sealing—and which is right for your piece.
- Maintenance: Simple tips for keeping your restored teak looking its best for years.
We believe that with a little guidance, anyone can get a result that looks truly professional. So, let's get started by figuring out what your specific teak treasure needs.
Assess the Condition of Your Teak Furniture
Before you even think about picking up a sander or a cleaning brush, the most important step is to figure out what you’re working with. Just like when we help customers in our 30,000-square-foot showroom here in Grants Pass, a proper diagnosis saves a ton of time and ensures you get the results you want. Learning how to restore teak starts with a careful look, not with a lot of elbow grease.
Take a moment to get up close and personal with your teak furniture. Is it just a little dusty from being in storage, or are you seeing bigger problems like mildew, stubborn water stains, or even small cracks in the wood? A good inspection now will save you from any surprises down the road.
From Silvery Patina to Serious Neglect
One of the most common questions we get is about the silver-grey color that outdoor teak naturally turns over time. A lot of people mistake this for damage, but it’s actually a natural patina. This is the wood's way of protecting itself, as the surface oils oxidize to shield the layers underneath. Honestly, some people love this distinguished, coastal look and want to keep it!
That being said, there’s a big difference between a beautiful, even patina and a piece that's been truly neglected.
- A Healthy Patina: This looks like a uniform, silver-grey color across the surface. The wood itself should still feel strong and relatively smooth, without any splintering or mold.
- Neglect or Damage: This is a whole different story. You’ll see a blotchy, uneven appearance, dark spots from mildew, a rough or splintery texture, and an overall grimy feel.
Making this distinction is key. A piece with a nice patina might just need a light cleaning. But a neglected table that’s been sitting under a damp tree near the Rogue River will need a lot more help than one that was on a covered patio in Ashland.
Matching the Condition to the Restoration Method
To make it even easier, we've put together a quick guide. It’s the same way we think when advising customers on everything from a La-Z-Boy recliner to one of our special "Unique Finds"—it's all about matching the solution to the problem. We believe in getting it right the first time.
We created this table to help you identify your teak's condition and find the best starting point for bringing it back to life.
| Teak Condition | Typical Appearance | Recommended Action |
|---|---|---|
| Lightly Dirty | Indoor furniture with dust or minor grime. Outdoor furniture with light surface dirt but still has its golden color. | Simple cleaning with a soft cloth and mild soap. |
| Faded & Dry | The wood looks pale and thirsty, having lost its rich, warm glow. Common for indoor pieces in sunny rooms. | Clean thoroughly and apply a fresh coat of teak oil. |
| Silver Patina | A uniform, silver-grey color on outdoor furniture. The wood texture is still relatively smooth. | Option 1 (Keep Patina): Gentle cleaning to remove dirt. Option 2 (Restore Color): Full cleaning and sanding before finishing. |
| Stained & Moldy | Dark spots, mildew, water rings, or other stains are visible. The surface may feel rough or uneven. | A deep clean with a dedicated teak cleaner, followed by thorough sanding, is necessary to remove stains. |
| Cracked or Damaged | Small cracks, loose joints, or significant surface roughness. | Requires cleaning, sanding, and minor repairs (like wood filler and re-tightening hardware) before finishing. |
Once you've figured out where your furniture stands, you can choose the right path forward and gather the supplies you’ll need. Getting this first step right is the foundation for a successful restoration that will keep your teak looking beautiful for many years.
The Nitty-Gritty: Cleaning and Sanding Your Teak
Alright, here’s where the magic really starts to happen. Getting your teak furniture properly cleaned is the most important part of this whole process. It strips away all that built-up grime, mildew, or old, peeling finish that’s hiding the gorgeous wood underneath. This is the prep work that makes the difference between a finish that looks just "okay" and one that looks incredible for years.
We often tell our customers, from Medford all the way down to Ashland, that you've got two main options for cleaning: a store-bought teak cleaner or a simple solution you can whip up at home. There's no one-size-fits-all answer here; it really comes down to what shape your furniture is in.
Choosing Your Cleaning Solution
If your teak has some serious stains or a thick, dark coat of mildew, a commercial teak cleaner is probably your best bet. These are specifically designed to power through that stubborn gunk without being too harsh on the wood itself.
On the other hand, if you're just dealing with a lightly soiled indoor piece or an outdoor table with that classic silvery-gray patina, a homemade mix can work wonders. It's a great first step in any deep spring clean.
Here are a couple of gentle, effective recipes we always recommend:
- Vinegar and Water: Just mix one cup of white vinegar into a gallon of warm water. It's fantastic for general cleaning and cutting through light mildew.
- Mild Soap Solution: A few drops of simple dish soap in a bucket of warm water is perfect for lifting away everyday dust and dirt.
No matter what you use, grab a soft-bristle brush and always scrub in the same direction as the wood grain. This prevents scratching the surface. It's this kind of careful work that's at the heart of our "Service and Value" promise—doing the job right to protect your beautiful furniture.
A good restoration always starts with a good plan. This simple flowchart breaks down how we think about the assessment process.

It’s just a little reminder that taking a moment to plan your attack is better than just jumping in with sandpaper and sealer.
The Art of Sanding for a Silky-Smooth Finish
Once your teak is completely dry—and we mean completely—it’s time to sand. This step is what smooths out the wood grain, which can get a little "fuzzy" after a good wash. It also creates the perfect surface for your new finish to grab onto.
We always suggest starting with fine-grit sandpaper, something around 120-grit, and remember to sand with the grain, not against it. For a final pass, you can switch to a 220-grit for an ultra-smooth feel.
An orbital sander can be a lifesaver on big, flat surfaces like a tabletop, but you'll want to switch to good old-fashioned hand sanding for the details and curves. The key is to let the sandpaper do the work. Don't press down too hard. You'll know you're finished when the wood feels silky to the touch and has an even, consistent color.
This fundamental process isn't just for teak furniture. Learning how to prepare a deck for staining follows the same exact principles of cleaning and sanding for a great, long-lasting result.
Putting in this effort is more than worth it. According to recent studies, the global market for teak furniture is growing substantially. For those of us who own these beautiful pieces—especially our one-of-a-kind reclaimed "Unique Finds"—it shows why a proper restoration isn't just a fun weekend project, but a smart way to protect your investment.
Choosing Your Finish: Oiling vs. Sealing
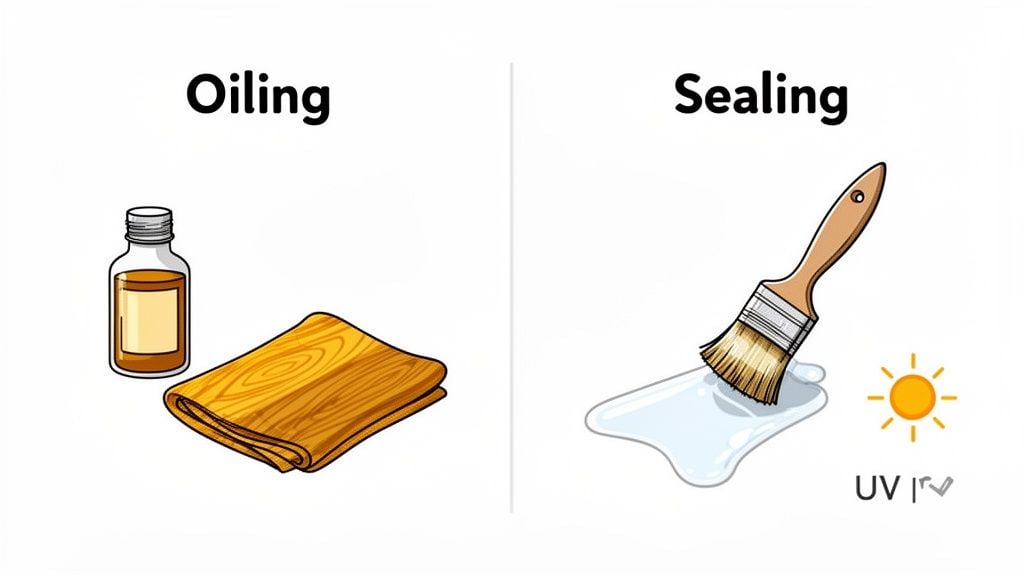
You’ve put in the hard work cleaning and sanding, and now your teak is ready for that final, protective layer. This is the step that locks in all your effort and brings out that beautiful, warm glow. The big question we always get from customers is, "Should I use oil or a sealer?" Honestly, the right answer really depends on where your furniture lives and how much upkeep you’re willing to do.
Here at Gates, we believe in making smart, long-lasting choices for your home. It’s why we offer programs like Gates Easy Pay, with options like $0 down and 6-month interest-free financing. We want protecting an investment to feel manageable, and choosing the right finish is just another part of that.
The Case for Teak Oil
Teak oil is the classic choice, and for good reason. It’s what gives you that deep, golden-brown color people fall in love with. The oil works by soaking into the wood, replenishing the natural oils that might have faded over time and giving the furniture a rich, almost "wet" look.
When we talk to customers in our Grants Pass showroom about our "Unique Finds"—especially those beautiful indoor reclaimed teak pieces—we often recommend oil. It’s absolutely perfect for furniture that isn't battling the Southern Oregon sun and rain every day.
- Pros of Oiling: It fantastically enriches the wood's color, gives you a traditional matte finish, and is simple to apply and touch up.
- Cons of Oiling: It offers very little UV protection, needs to be reapplied more often (every 3-6 months for outdoor pieces), and can sometimes attract mildew if you put too much on.
An oiled finish is our go-to for an indoor teak dining table or a decorative piece where you want a deep, vibrant luster.
The Case for a Teak Sealer
Now, if your teak furniture lives outside on a sunny patio in Medford or Central Point, a modern teak sealer is almost always the more practical choice. Unlike oils that feed the wood from within, sealers create a tough protective barrier right on the surface. This barrier is what shields the wood from moisture and, most importantly, those damaging UV rays.
Think of a sealer as sunscreen for your furniture. It stops the sun from breaking down the wood fibers and bleaching out that beautiful golden color, which is what prevents the wood from turning that silvery-gray.
Sealers are formulated to last much longer than oils, usually only needing a new coat once a year. This makes them a fantastic, low-maintenance option for busy homeowners. While they might not provide the exact same deep, penetrating richness you get from an oil, they offer far superior, long-lasting protection against the elements.
The demand for high-quality teak is only growing. By restoring and preserving your pieces, you’re not just making an aesthetic choice; you’re aligning with a major consumer trend toward sustainability you can see in these trends in the teak furniture market. It’s a wise move all around.
Knowing how to protect your furniture from the dings and spills of daily life is just as crucial. For a deeper dive, take a look at our guide on how to protect your wood furniture from scratches and stains.
Maintaining Your Restored Teak Furniture
You’ve put in the work, and your teak furniture looks incredible. Now, the real key is keeping it that way. A simple maintenance schedule is all it takes to protect your investment and ensure that rich, golden glow lasts for years, whether it's an indoor piece or an outdoor set soaking up the Rogue Valley sunshine.
Consistent care is so much easier than tackling another full restoration down the road. This kind of proactive care is exactly what our founder, George Gates, had in mind when he established our company on "Service and Value" back in 1946—it’s all about taking care of what’s important to you.
Your Simple Teak Maintenance Plan
Keeping that fresh-from-restoration look doesn't have to be a major chore. A little bit of routine care makes a huge difference.
- Routine Cleaning: For all your teak, periodically wipe it down with a damp cloth and a mild, soapy water solution. This simple step removes the dust and daily grime that can lead to bigger stains. For more general tips, our guide on how to care for your wood furniture is a great resource.
- Reapplying Finishes: If you oiled your outdoor furniture, plan on reapplying a light coat every 6-12 months, or just whenever it starts to look a bit dry. For pieces treated with a sealer, you’ll likely only need to reapply it once a year to keep it protected.
- Winter Protection: Before the Southern Oregon winter arrives, give your outdoor teak a thorough cleaning. If you can, move it to a sheltered spot like a garage or covered patio, or use a quality breathable furniture cover.
When you invest time and care into restoring teak, you are actively preserving its value. Maintaining it properly not only keeps it beautiful but also makes sound economic sense, as it’s a highly sought-after material.
Knowing When to Call a Professional
We’ve always believed in giving our neighbors honest advice. While most teak maintenance is perfectly straightforward, some situations are really best left to a professional. If you come across severe structural damage—think deep cracks, broken joints, or widespread rot—an expert restorer is your wisest choice.
While we don't offer restoration services ourselves, we’re always here to help guide you toward the best solution for your furniture. It’s the same philosophy that drives our White-Glove Delivery service. We don't just drop boxes; we provide professional assembly and mattress haul-away, ensuring every new piece from brands like Flexsteel or La-Z-Boy is set up perfectly in your home. As you continue to care for your pieces, you might find it interesting to learn more about the world of sustainable teak garden furniture and its long-term environmental impact.
Your Teak Restoration Questions Answered
Working in the furniture business for as long as we have, you hear just about every question under the sun. Since our founder, George Gates, opened our doors back in 1946, we’ve always tried to share practical advice based on his promise of "Service and Value." When it comes to teak, a few questions pop up time and time again.
Here are the answers we give our customers right here in our Grants Pass showroom.
Can I Just Pressure Wash My Teak Furniture?
We know it’s tempting to pull out the pressure washer for a quick fix, but please don't. We strongly, strongly advise against it. The intense pressure is just too aggressive for teak. It will blast away the wood’s softer grain, leaving behind a fuzzy, splintered surface that’s a real pain to fix.
You’re much better off using a soft-bristle brush and a good-quality teak cleaner. It takes a little more elbow grease, but this gentle approach keeps the wood’s integrity intact, ensuring your furniture will be around for many more seasons in your Grants Pass or Medford home.
My Outdoor Teak Turned a Silvery-Grey. Is It Ruined?
Not at all! In fact, that beautiful, silvery patina is exactly what's supposed to happen. It's a natural protective layer the wood creates to shield itself from the elements. Honestly, many people here in the Rogue Valley specifically want that classic, weathered look for their outdoor patios and gardens. It’s a sign of high-quality, aging teak—not damage.
If you love the silver color, just give it a simple cleaning to get rid of any surface dirt and you're done. But if you miss that original honey-gold color, you can absolutely bring it back by following the cleaning, sanding, and finishing process we covered earlier.
How Often Should I Re-Oil My Teak?
That really comes down to where your furniture lives. For an indoor piece—maybe one of our "Unique Finds" in the living room—you might only need to touch it up with oil every year or two, just to keep it looking its best.
Outdoor furniture, on the other hand, is a different beast, especially under that strong Southern Oregon sun.
- To maintain that rich, golden-brown color, you’ll likely need to re-oil your outdoor teak every 3-6 months.
- If you choose a sealer instead of an oil, your maintenance window is much longer, usually a year or more.
A good rule of thumb is to simply keep an eye on it. When the wood starts looking a little dry or faded, it’s time for a fresh coat. As you get inspired to add more character to your space, you might find something you love in our collection of unique home decor pieces.
Is Teak Oil the Same as Tung or Linseed Oil?
That's a great question, and the answer is no, they're not quite the same. Most products sold as "teak oil" are actually specialized formulas. They typically use a base of tung or linseed oil but are mixed with other solvents and, most importantly, UV inhibitors. This blend is specifically designed to penetrate dense hardwoods like teak and protect them from the sun.
While you can use pure tung or linseed oil, they tend to dry much more slowly and don't offer the same level of protection. For consistent, reliable results on your furniture, we always recommend sticking with a product labeled specifically as "teak oil" or "teak sealer." This ensures you're getting the best protection for brands we carry, like Ashley and Flexsteel.
At Gates Home Furnishings, we truly believe a well-cared-for home is a happy one. Whether you're breathing new life into a family heirloom or searching for that perfect new piece, our family and our team are here to help. With our Gates Easy Pay financing, getting the furniture you love is simpler than ever.
Ready to find your next treasure? Visit our 30,000-square-foot showroom in Grants Pass to test the comfort for yourself or browse our full collection online today!
